The vehicle:
1993 Mitsubishi 3000GT 2WD (this guide applies to years 93-99 2WD 3000GTs and 2WD 93-96 Dodge Stealths. Later, I will update this content with notes in regard to 4WD models.
Tools Required
This is job was done with basic hand tools; I did not use any power or air tools to loosen nuts. However, owning an air ratchet is very convenient so you can give a break to your hands and wrists.
- 3/8" Socket/ratchet set and wrench set (8-19mm)
- 3/8" Socket extensions (2", 6", 8" long will suffice)
- 1/2" breaker bar (an 1-2" diameter X 12" or longer pipe will be good to have handy for creating leverage)
- 32mm Axle Nut Socket
- Lug wrench
- 10mm flare nut wrench (not necessary but good for reducing the chances of rounding the clutch line's fitting.)
- Favorite hammer
- Screwdrivers both phillips and slotted
- 16" or longer pry bar
- Needle noze pliers
- Vise Grip locking jaws
- Tire chocks or something similar (4x4 blocks wedged)
- Oil pan
- A few 4x4x8 wood blocks
- O-ring removal tool or slotted precision screwdriver
Transmission Removal
- We start in activating the emergency brake and placing the chocks in one or both of the rear tires. Remove the cotter pin with the long nose pliers and loose both left and right CV joint axle nuts with the breaker bar and 32mm socket; loose the lug nuts as well.
- Disconnect the battery.
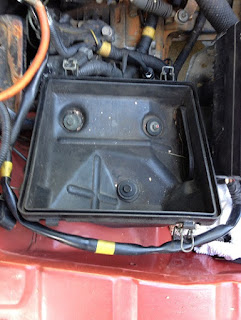
- Remove the air filter housing cover and intake pipe/boot by unplugging the MAF sensor connector,loosing the intake pipe clamp to throttle body, and detaching the four securing clips on the air filter housing cover. Pull everything as one unit by rocking it until the boot detaches from the throttle body.
- It will wise to label every electrical connector with blue painters tape for easy reassembly.
 |
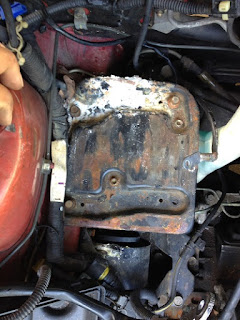
- Remove the air filter housing, battery, and battery tray. There are 3 (12mm) bolts holding the air filter housing that you need to remove. The battery tray is hold down by 3 (12mm) bolts and the windshield washer fluid reservoir is hold to the tray by 2 (10mm) nuts.
- After removing the tray, pull the washer fluid reservoir and unplug the pump connector and the hose going to a Y-connector in the hood for the windshield sprayers.
- Start removing and labeling all electrical connections to the transmission.
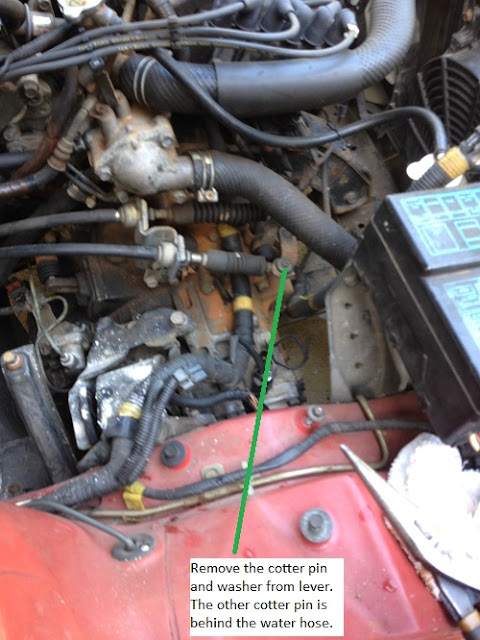
- Next, we move to disconnect the shifting mechanism. There are two cables hold by a washer and cotter pins that need to be removed from the transmission levers.
- Then, remove the cables' supporting bracket from the transmission; it is hold by two 12mm bolts. Put the cables away by tucking them behind the strut tower.
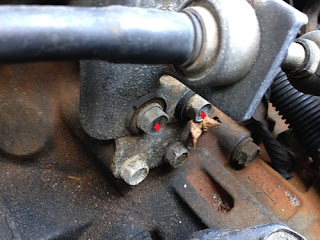 |
| Remove both top bolts only. |
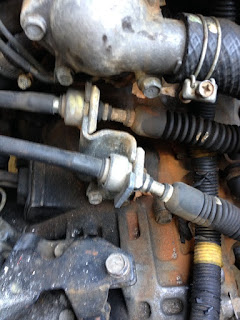
- It is time to remove the speed sensor plug. It is hold by a clip and you need a slotted precision flat screwdriver or the o-ring removal tool. A regular screwdriver will work too but takes more precaution in not busting the connector.
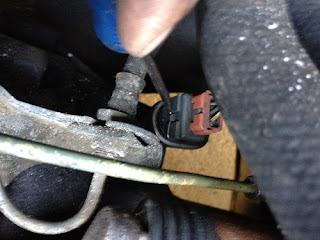 |
| Take your time doing this because this type of clips tend to go out all the way and dropping it in a place that you may not find it. |
 |
| By having the clip in that position, you are able to remove the plug. After removing the plug push back the clip because during installation will just slide and hold it in plac |
- Spray PB Blaster on the clutch hydraulic line going to the slave cylinder so will turn easier. Loose the nut with the 10mm flare nut wrench and a 17mm wrench holding the line in the other side. I did mine out of a 10mm wrench and a grinder.
 |
| There is no need to remove the other line since we will removing the bracket holding it. |

- Remove the 12mm bolts holding the clutch line bracket and set aside the line out of your way.
- That's it in the engine bay for now. Start setting the vehicle in jack stands and remove both wheels. Also, drop the transmission oil in a clean recipient for reuse.
- Begin removing the outer tie rod ends from the steering knuckle and other parts so the CV axle can be removed. The tie rod has a castle nut and cotter pin in my case but you may have nyloc nuts; use the appropriate wrench or socket size. It can range from 17mm to 19mm.
- When removing the tie rod end, you can go in either of the following routes:
- Buy a tie rod puller
- Bang with a hammer on the arm of the knuckle where the tie rod attaches--refer to the pic.
- Next, remove the two bolts holding the strut to the knuckle.
 |
| Wrench set up shown for more leverage. |
- Pull out the CV joint out of the knuckle. You may have to hammer the shaft a little bit for loosing; if doing so, remember to put the nut flush so damage to the threads can be prevented when hammering. Then pull the complete axle out of the transmission.
- Do the same process in the driver's side. The only difference is that the CV axle is supported by a bracket bolted to the engine. You will need to remove two 12mm bolts and pry the bracket out of its locking position.
- Remove the starter
- Lastly, you need to remove all the bolts holding the transmission to the engine. Support the transmission with a jack and remove the upper transmission mount. Make sure that nothing is still attached and start separating and lower the transmission. The engine will remain supported by the crossmember. Leave the transmission in the jack and pull it away from the engine so you can have space for removing the clutch. Change the clutch and pressure plate with new parts. If you bought a kit, it should come with a clutch aligning tool that makes the job easier. The pressure plate bolts are torqued at 13lb/ft.
- Replace the throw out bearing as well.
- After you have finished installing the new parts, proceed to jack up the transmission and align it as best as you can with the engine. If the transmission is not going in, try to put in gear or change it to a lower gear and try again with a little of jiggle. Reinstall the bolts and tighten to 55ft-lb of torque.
- Reinstall the remaining of parts by following the reverse of the disassembly.
- Bleed the clutch lines.
- Test drive.
That's it for this article. Please, leave you comments or suggestions.
Thanks
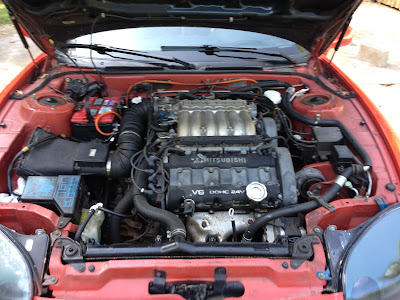



Great set instructions and very helpful pictures. Much appreciated.
ReplyDeleteThis was so incredibly helpful. Thank you!
ReplyDelete