After removing the head, I jump to inspect the cylinder head gasket, engine block mating surface, and the cylinder head.
The head gasket was showing some interesting foreign material, that in my opinion looked like silicone, that probably was the culprit for damaging the head gasket--due to overheating probably--and letting the oil travel to one of the coolant passages. In the picture below you can clearly see that big rubbery piece blocking the oil flow passage to the head which could force the oil to slip through the gasket and hit the coolant passage.
The head gasket was showing some interesting foreign material, that in my opinion looked like silicone, that probably was the culprit for damaging the head gasket--due to overheating probably--and letting the oil travel to one of the coolant passages. In the picture below you can clearly see that big rubbery piece blocking the oil flow passage to the head which could force the oil to slip through the gasket and hit the coolant passage.
Before moving to any inspection in the engine block and the cylinder head, we need to clean thoroughly the mating surfaces in order to see for deformations and be able to obtain accurate readings when checking for flatness. One way to clean the surfaces is utilizing razor blades and cleaning agents such as carburetor or brake cleaner; this process should be done with patience and slow in order to not gouge the cylinder head or engine block.
After cleaning the surfaces, we move to check for deformations or gouges; if they're not present we check for flatness.
In the engine block, we first remove the dowel pins that hold the head gasket and cylinder head in place. A precision straight edge is necessary for this process as well as a filler gauge. The block is checked in 6 planes for distortion; the maximum tolerance in this engines for warpage is .002 in both for block and head. Greater than that, the block or head will need to be resurfaced to the required tolerance.
In the case of this 4AFE engine, the head was warped and I took it to my favorite machine shop for resurface. After a couple of days, I got his back:
 |
| Assuming the head gasket is either the block or head surface, we put our straight edge according to the lines and we check with the filler gauge all along the straight edge for gaps greater than .002. |
In the case of this 4AFE engine, the head was warped and I took it to my favorite machine shop for resurface. After a couple of days, I got his back:
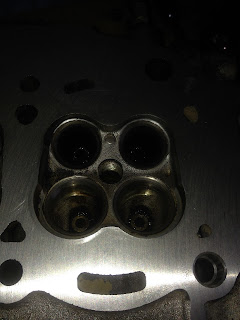
I rechecked it for flatness in order to assure myself that I will be installing a flat head and will seal properly. I also took the time to clean the combustion chambers from carbon buildup which will help to reduce the chances of detonation or pre-ignition.
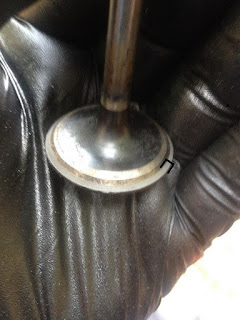
After cleaning the chambers, I moved to lap the valves. Nowadays, valve lapping is considered only as one method for checking the valve and its seat mating surfaces are compatible for sealing; after lapping a few times, you should be able the accomplish a consistent grey ring in both surfaces. If you don't get this, the head may be due for a valve job. However, in the old school days, valve lapping was used, to some degree, grind the valves and seats and restore their sealing capabilities to just like new. You can actually buy different compound grits in order to undertake this process; I remember my father had at least a 120, 220, and 400 grit in his tool box or a double end can with both coarse and fine in each side. It's important to remember, though, that the valve guides must be in good shape--minimal play; if they have a lot play, it won't work.
For this head, I just did an average of 5 times lapping the valves since the surfaces were in good shape.
 |
| A cheap Autozone lapping tool and fine compound; just enough for refreshing the mating surfaces |
 |
| After a few times lapping the valves I got this nice consistent grey line |
After doing all the valves, I assembled the head and got this final product which make feel satisfied in order to get it installed.
That is it for this write up. However, below a give you a couple of points I took when disassembling this head:
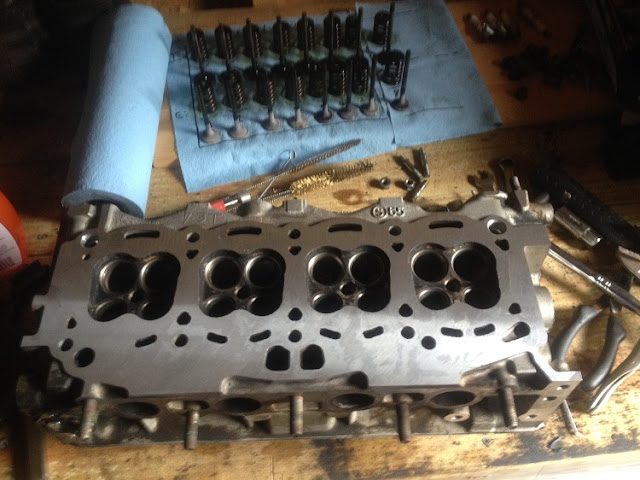
- Always organize the valves with their corresponding place, spring, washer, and retainers in order to avoid rapid wear in the head components. I use a plywood board that I label for each valve and place in their corresponding label using on starting point in the head (usually I start in the #1 combustion chamber and move in numerical order)
- Removing the springs in this head are a PITA. You will need a special spring compressor that will allow you to compress the spring and at the same time give you room for removing the retainers. I utilize a C clamp and 13/16 or 3/4 spark plug socket (I don't remember the exact size--I will update this) which I cut like a O2 sensor removal socket where it allowed me to insert my pickup tool. In the picture, I did not weld the socket to the clamp, but it would be good if you do since is safer. Notwithstanding, always keep your face out of the way of the spring when compressing and take your time. .


It is said that one should rather use high tensile bolts than the OEM stretch bolts. This makes sense in that the number of bolt related failures appear to be rather high. I would be interested to read your comments about this.
ReplyDeleteThanks for your emailed feedback. Appreciated. We opted (for all 4A-FE engine repairs) to re-torque the replacement stretch bolts after the engine had been thermally cycled 5 times (idled until full operating temperature) and slowly driven for a total of approx 50 miles. After this, ALL the innermost head bolts were found to be far under the 60nm initial torque, so re-torquing is considered to be time and effort well spent. (OHC removal, head re-torquing and re-installation, is a rather quick affair, and takes less than 45 minutes.) We also consulted someone who races these engines, and they opt for a final torque of 66nm, as opposed to the suggested 60nm - with the caveat that a calibrated torque wrench be used. The +90 degree method apparently only applies to the early 4A engines. For the 4A-FE, the cylinder head was re-designed to a cross flow head, hence the change in torque specs.
ReplyDeleteThe reason for my initial question, was that here in Africa, the ambient summer temperatures can be excessive, and premature head gasket failure seems to result due to this.
Thanks for a well designed site, with image clarification that should be of great use to many users.